
Protocollo della Reazione a Catena della Polimerasi (PCR)
Introduzione
La Reazione a Catena della Polimerasi (PCR) è una tecnica fondamentale in biologia molecolare, che consente l'amplificazione di sequenze di DNA specifiche a partire da quantità minime di materiale iniziale. Inventata da Kary Mullis nel 1983, la PCR ha rivoluzionato la ricerca genetica, la diagnostica, la medicina forense e la biotecnologia. Questo protocollo fornisce una guida completa per eseguire la PCR standard, includendo passaggi dettagliati, specifiche dei reagenti, risoluzione dei problemi e strategie di ottimizzazione.
Principio della PCR
La PCR è un processo enzimatico che amplifica un segmento specifico di DNA attraverso cicli ripetuti di denaturazione, annealing ed estensione. La reazione si basa su una DNA polimerasi termostabile, tipicamente la Taq polimerasi, che resiste alle alte temperature necessarie per denaturare il DNA a doppia elica (Figura 1).
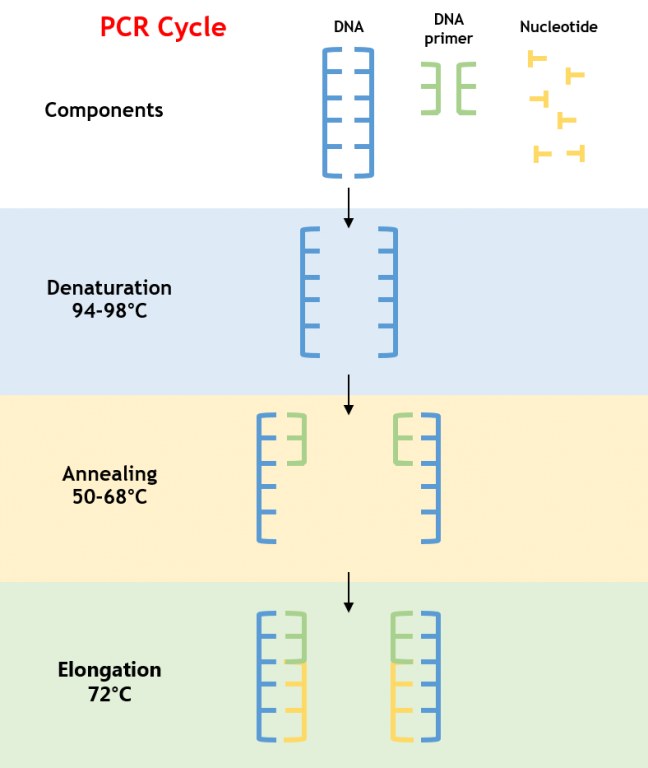
Figura 1: Processo di Amplificazione PCR
- Denaturazione: Il DNA viene riscaldato a 94–98°C, rompendo i legami a idrogeno per ottenere filamenti di DNA a singola elica.
- Annealing: La temperatura viene abbassata a 50–68°C, consentendo ai primer di legarsi alle sequenze complementari che fiancheggiano il DNA bersaglio.
- Estensione: La temperatura viene aumentata a 72°C, ottimale per la Taq polimerasi per sintetizzare nuovi filamenti di DNA aggiungendo deossinucleotidi trifosfati (dNTPs).
Materiali e Attrezzature
Prima di iniziare, assicurarsi che tutti i reagenti e le attrezzature siano disponibili e correttamente conservati. Utilizzare reagenti di grado biologia molecolare per evitare contaminazioni o inibizioni.
Reagenti
- Taq DNA Polimerasi: Conservata a -20°C.
- Buffer PCR 10X: Tipicamente include 100 mM Tris-HCl, 500 mM KCl e 15 mM MgCl₂ (pH 8.3–8.8). Alcuni buffer non contengono MgCl₂, richiedendo un'aggiunta separata. Conservare a -20°C o 4°C secondo il produttore.
- Cloruro di Magnesio: Soluzione di MgCl₂ 25 mM (se non inclusa nel buffer PCR). Conservare a -20°C o 4°C.
- dNTPs: Deossinucleotidi trifosfati (dATP, dTTP, dCTP, dGTP; 10 mM ciascuno, combinati o separati). Conservare a -20°C.
- Primer: Primer forward e reverse (stock 100 µM in buffer TE, diluiti a 10 µM per soluzione di lavoro).
- DNA Template: DNA genomico (10–100 ng), DNA plasmidico (0.1–1 ng) o cDNA (1–10 ng), a seconda dell'applicazione. Conservare a -20°C.
- Acqua Priva di Nucleasi: Acqua sterile di grado biologia molecolare. Conservare a temperatura ambiente.
- Mix Master
- Colorante SYBR® Safe per Gel di DNA: Per la visualizzazione su gel di agarosio (alternativa: bromuro di etidio, ma usare con cautela per la tossicità). Conservare a 4°C.
- Colorante di Carico 6X: Per elettroforesi su gel (es. contenente bromofenolo blu e xilene cianolo). Conservare a 4°C.
- Scala di DNA: Scala da 100 bp o 1 kb, a seconda della dimensione dell'amplicone atteso. Conservare a -20°C.
Attrezzature
- Ciclatore Termico: Macchina PCR programmabile.
- Tubi PCR: Tubi PCR a parete sottile da 0.2 mL o piastre a 96 pozzetti, compatibili con il ciclatore termico.
- Pipette e Puntali: Pipette calibrate (P2, P10, P20, P200, P1000) con puntali filtranti per prevenire contaminazioni.
- Microcentrifuga: Per brevi centrifugazioni per raccogliere i componenti della reazione.
- Sistema di Elettroforesi su Gel di Agarosio: Inclusi vassoio di colata del gel, pettine, alimentatore e transilluminatore UV (o luce blu per SYBR Safe).
- Miscelatore Vortex: Per mescolare i reagenti.
- Secchiello per Ghiaccio: Per mantenere i reagenti freddi durante la preparazione.
- Spettrofotometro: Per quantificare la concentrazione di DNA.
Protocollo PCR
Passo 1: Progettazione e Preparazione dei Primer
I primer sono oligonucleotide di DNA a singola elica corti (18–25 basi) che fiancheggiano la sequenza target e fungono da punti di partenza per la sintesi del DNA. Una corretta progettazione dei primer è fondamentale per un'amplificazione specifica ed efficiente.
Linee Guida per la Progettazione dei Primer
Utilizzare strumenti software per progettare i primer. Seguire questi criteri:
- Lunghezza: 18–25 basi. Primer più corti (<18) possono mancare di specificità; primer più lunghi (>25) possono formare strutture secondarie.
- Temperatura di Fusione (Tm): 55–65°C, con primer forward e reverse entro 2°C l'uno dall'altro. Calcolare la Tm usando la formula per una stima di base, o utilizzare software per maggiore precisione (considera sale e concentrazione del primer).
Tm = 4 (G+C) + 2 (A+T)
- Contenuto GC: 40–60%. Evitare estremi (<30% o >70%) per prevenire un annealing scarso o strutture secondarie.
- Estremità 3': Terminare con una G o C (accoppiamento di basi più forte) ed evitare sequenze di tre o più basi identiche (es. GGG) per ridurre il mispriming.
- Specificità: Verificare la specificità usando NCBI BLAST (blast.ncbi.nlm.nih.gov) per garantire che i primer si leghino solo alla sequenza target. Evitare omologie con regioni non target.
- Strutture Secondarie: Evitare forcine, auto-dimeri e etero-dimeri. Il Delta G per i dimeri dovrebbe essere >-5 kcal/mol.
- Dimensione dell'Amplicone: Progettare per ampliconi di 100–1000 bp per PCR standard. Ampliconi più lunghi (fino a 5 kb) sono possibili ma richiedono ottimizzazione.
- Evitare Ripetizioni: Non posizionare i primer in regioni con sequenze ripetitive o a bassa complessità (es. ATATAT).
Sintesi e Conservazione dei Primer
- Ordine: Ordinare primer purificati HPLC. La purificazione HPLC garantisce alta purezza, riducendo l'amplificazione non specifica.
- Risospendimento: Risospendere i primer liofilizzati in buffer TE (10 mM Tris-HCl, 1 mM EDTA, pH 8.0) a una concentrazione stock di 100 µM.
- Soluzione di Lavoro: Diluire lo stock a 10 µM in acqua priva di nucleasi. Conservare a -20°C.
- Conservazione: Conservare gli stock a 100 µM a -20°C per un massimo di 1 anno; le soluzioni di lavoro a 10 µM sono stabili a -20°C per 6 mesi o a 4°C per 1 mese. Evitare cicli di congelamento-scongelamento ripetuti (>10) per prevenire la degradazione.
Controllo Qualità dei Primer
- Quantificazione: Verificare la concentrazione del primer usando uno spettrofotometro (A260). L'assorbanza attesa per 100 µM è ~0.3–0.5, a seconda della sequenza.
- Integrità: Opzionale—eseguire i primer su un gel di agarosio al 2% per confermare l'assenza di degradazione (dovrebbero apparire come una singola banda netta).
- Test di Amplificazione: Eseguire una PCR di prova con un template noto per confermare la funzionalità del primer prima di esperimenti su larga scala.
Passo 2: Preparazione della Reazione
La miscela di reazione PCR contiene tutti i componenti necessari per l'amplificazione del DNA. Il protocollo fornito è scalato per un volume di reazione di 50 µL, con un mix master per 11 reazioni (10 campioni + 1 controllo senza template) per tenere conto delle perdite di pipettaggio.
Componenti della Reazione
La tabella seguente elenca i reagenti e i volumi per una reazione da 50 µL e il mix master per 11 reazioni.
| Reagente | Volume per Reazione (µL) | Totale per 11 Reazioni (µL) |
| Acqua Priva di Nucleasi | 36.5 | 401.5 |
| Buffer PCR 10X | 5.0 | 55.0 |
| dNTPs (10 mM ciascuno) | 1.0 | 11.0 |
| MgCl₂ (25 mM) | 3.0 | 33.0 |
| Primer Forward (10 µM) | 1.0 | 11.0 |
| Primer Reverse (10 µM) | 1.0 | 11.0 |
| Taq Polimerasi (5 U/µL) | 0.5 | 5.5 |
| DNA Template (variabile) | 3.0 | Aggiungere separatamente |
Passo 3: Ciclaggio Termico
Il ciclatore termico sottopone la reazione a cambiamenti ripetuti di temperatura per facilitare la denaturazione, l'annealing e l'estensione. Le condizioni di ciclaggio fornite sono ottimizzate per PCR standard con Taq polimerasi e ampliconi di 100–1000 bp.
|
|
|
|
|
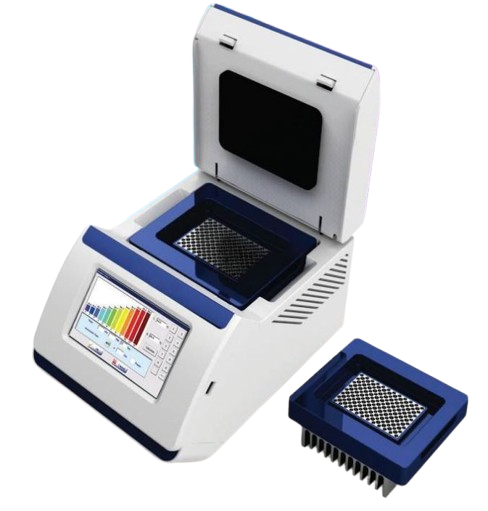
NeoCycler Trio - Ciclatori Termici Multi-Blocco (Cat# NB-12-3024) NeoCycler Duo - Ciclatori Termici Multi-Blocco (Cat# NB-12-3025)
|
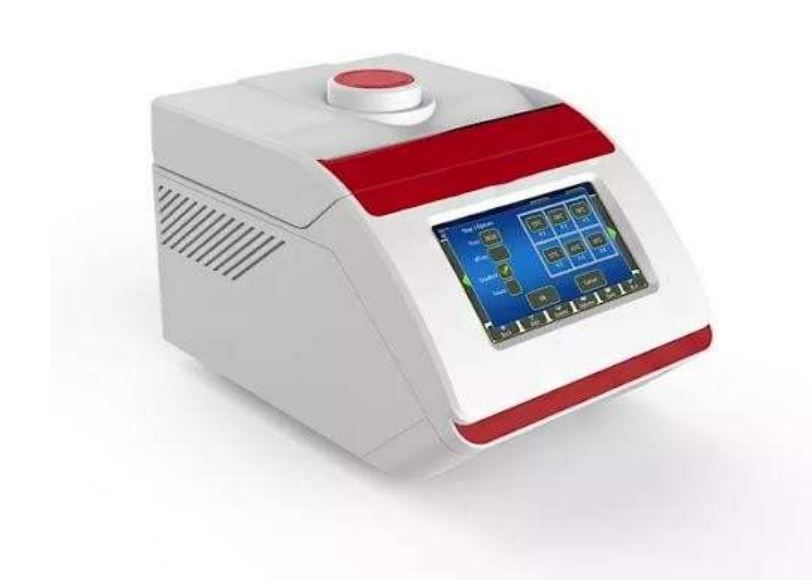
NeoCycler 300 - Ciclatori Termici a Gradiente Veloce (con modulo 9677 / 96) (Cat# NB-12-3001) NeoCycler 200 - Ciclatori Termici a Gradiente (Cat# NB-12-3002) NeoCycler 100 - Ciclatori Termici Non a Gradiente (con modulo 9677 / 96) (Cat# NB-12-3003) |
|
|
|
|
|
|
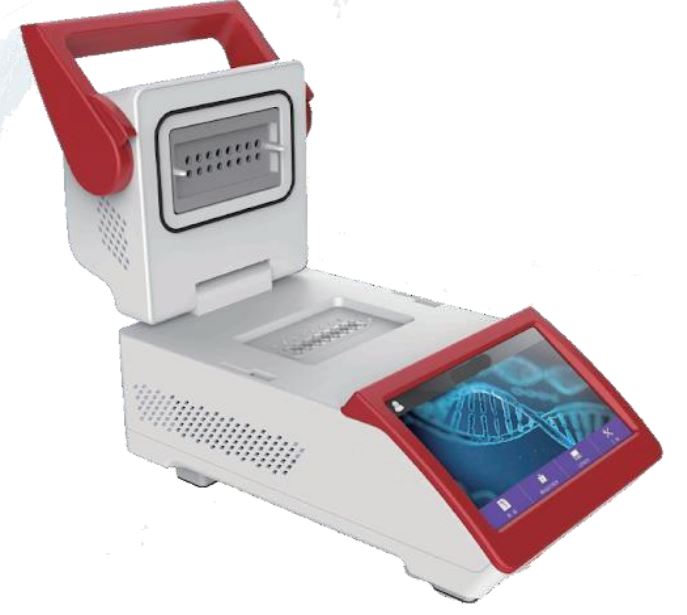
NeoCycler 600 - Ciclatori Termici Super Gradiente (Cat# NB-12-3026) |
NeoCycler Mini (Cat# NB-12-3029-2) |

Programma di Ciclaggio Termico
Programmare il ciclatore termico con i seguenti passaggi:
- Denaturazione Iniziale: 95°C per 2 minuti
- Denatura il DNA a doppia elica e attiva la Taq polimerasi (le versioni hot-start possono richiedere tempi più lunghi, ad esempio 5–10 minuti).
- Ciclaggio (30–35 cicli):
- Denaturazione: 95°C per 30 secondi
- Separa i filamenti di DNA. Tempi più brevi (15–20 secondi) possono essere sufficienti per template piccoli (es. plasmidi).
- Annealing: 55–65°C per 30 secondi
- I primer si legano alle sequenze complementari. Impostare 2–5°C sotto la Tm del primer più basso (es. se la Tm è 60°C, usare 55–58°C). Ottimizzare se necessario (vedere Sezione 8).
- Estensione: 72°C per 1 minuto per kb
- La Taq polimerasi sintetizza nuovo DNA. Per un amplicone da 500 bp, usare 30–60 secondi; per 1 kb, usare 60 secondi. Minimo 30 secondi per <500 bp.
- Denaturazione: 95°C per 30 secondi
- Estensione Finale: 72°C per 5 minuti
- Completa le estensioni parziali e aggiunge sporgenze 3' A (utili per la clonazione TA).
- Mantenimento: 4°C indefinitamente
- Conserva le reazioni fino al recupero. Evitare una conservazione prolungata (>24 ore) per prevenire la degradazione.
Numero di Cicli
- Standard: 30 cicli per quantità moderate di template (10–50 ng di DNA genomico).
- Template Basso: 35 cicli per quantità basse di template (<1 ng) o cDNA.
- Template Alto: 25–28 cicli per quantità elevate di template (>100 ng) per ridurre prodotti non specifici.
- Cicli Eccessivi: >35 cicli possono aumentare l'amplificazione non specifica o i dimeri di primer.
Impostazioni del Ciclatore Termico
- Temperatura del Coperchio: Impostare a 105°C per prevenire la condensa.
- Velocità di Rampa: Usare le impostazioni predefinite (2–5°C/secondo). Rampe più veloci possono richiedere regolazioni per macchine più vecchie.
- Volume: Impostare a 50 µL nel programma del ciclatore per un riscaldamento accurato.
Variazioni
- Ampliconi Corti (<200 bp): Ridurre il tempo di estensione a 15–30 secondi.
- Ampliconi Lunghi (1–5 kb): Aumentare il tempo di estensione (1–2 minuti/kb) e considerare polimerasi ad alta fedeltà.
- Template Ricchi di GC: Usare temperature di denaturazione più alte (98°C) o additivi come DMSO (5–10%).
Passo 4: Analisi dei Prodotti PCR
Dopo la PCR, analizzare i prodotti per confermare il successo dell'amplificazione e la dimensione dell'amplicone. L'elettroforesi su gel di agarosio è il metodo standard.
Preparazione del Gel di Agarosio
- Concentrazione del Gel:
- 1% di agarosio per ampliconi da 500–5000 bp.
- 1.5–2% di agarosio per ampliconi da 100–500 bp.
- Preparazione del Gel:
- Pesare l'agarosio.
- Dissolvere in buffer TAE 1X (40 mM Tris, 20 mM acido acetico, 1 mM EDTA) riscaldando nel microonde fino a ottenere una soluzione chiara.
- Raffreddare a ~50°C, aggiungere SYBR Safe (1 µL per 10 mL di gel, secondo il produttore) e versare in un vassoio di colata con pettine.
- Lasciare solidificare per 20–30 minuti.
- Setup: Posizionare il gel in un serbatoio per elettroforesi riempito con buffer TAE 1X.
Preparazione del Campione
- Miscelazione del Campione: Combinare 10 µL di prodotto PCR con 2 µL di colorante di carico 6X (finale 1X).
- Caricamento della Scala: Caricare 5–10 µL di scala di DNA (100 bp o 1 kb, a seconda della dimensione dell'amplicone) in una corsia.
- Caricamento dei Campioni: Caricare 12 µL di ogni prodotto PCR + miscela di colorante in pozzi separati. Includere il Controllo Senza Template (NTC) per verificare la contaminazione.
Elettroforesi
- Esecuzione del Gel: Eseguire a 80–120 V per 30–60 minuti, fino a quando il colorante di carico (bromofenolo blu) migra per circa 2/3 della lunghezza del gel.
- Visualizzazione: Usare un transilluminatore UV (o luce blu per SYBR Safe) per visualizzare le bande. Fotografare il gel per la documentazione.
Interpretazione
- Banda Attesa: Confrontare la dimensione della banda con la scala di DNA. Dovrebbe corrispondere alla dimensione dell'amplicone prevista (in base alla progettazione del primer).
- NTC: Non dovrebbero apparire bande nella corsia NTC. Le bande indicano contaminazione o dimeri di primer.
- Sbavatura: Indica amplificazione non specifica, template degradato o eccesso di DNA.
- Nessuna Banda: Suggerisce un'amplificazione fallita.
Post-Analisi
- Conservazione: Conservare i prodotti PCR a -20°C per settimane o a 4°C per 1–2 giorni.
- Purificazione: Per applicazioni successive (es. sequenziamento, clonazione), purificare i prodotti usando un kit di pulizia PCR o un kit di estrazione da gel.
- Quantificazione: Misurare la concentrazione del prodotto usando un Nanodrop o un fluorimetro, se necessario.
Controllo di Qualità e Validazione
Per garantire risultati affidabili, incorporare il controllo di qualità in ogni fase.
Qualità del Template
- Purezza: Un rapporto A260/A280 di 1.8–2.0 indica DNA puro. Rapporti più bassi suggeriscono contaminazione da proteine o RNA.
- Integrità: Eseguire il DNA template su un gel di agarosio allo 0.8% per confermare l'assenza di degradazione (il DNA genomico dovrebbe apparire come una banda ad alto peso molecolare).
- Concentrazione: Usare 10–100 ng di DNA genomico o 0.1–1 ng di DNA plasmidico per reazione da 50 µL.
Qualità dei Reagenti
- dNTPs: Verificare la degradazione (conservare a -20°C, evitare >10 cicli di congelamento-scongelamento).
- Taq Polimerasi: Verificare l'attività testando con una coppia di primer-template nota.
- Primer: Confermare concentrazione e integrità.
Controlli
- NTC: Rileva contaminazione o dimeri di primer.
- Controllo Positivo: Usare una coppia di primer-template nota per confermare le condizioni di reazione.
- Controllo Negativo (opzionale): Omettere la polimerasi per verificare l'amplificazione non specifica.
Analisi del Gel
- Scala: Assicurarsi che la scala si risolva chiaramente per confermare la qualità del gel.
- Intensità della Banda: Bande forti e singole indicano un'amplificazione riuscita. Bande deboli o multiple suggeriscono la necessità di ottimizzazione.
Risoluzione dei Problemi
La PCR potrebbe richiedere ottimizzazione per ottenere un'amplificazione specifica e ad alto rendimento. Di seguito sono riportati problemi comuni e soluzioni.
Nessuna Amplificazione
- Causa: Bassa concentrazione del template, template degradato, primer errati o temperatura di annealing non ottimale.
- Soluzioni:
- Aumentare il template (fino a 200 ng) o i cicli (fino a 35).
- Verificare l'integrità del template su un gel.
- Confermare le sequenze dei primer e la Tm; riprogettare se necessario.
- Eseguire una PCR a gradiente (annealing 50–65°C) per trovare la temperatura ottimale.
- Verificare l'attività della Taq polimerasi con un controllo positivo.
Bande Non Specifiche
- Causa: Temperatura di annealing bassa, alta concentrazione di MgCl₂, eccesso di primer o legame non specifico dei primer.
- Soluzioni:
- Aumentare la temperatura di annealing di incrementi di 1–2°C.
- Ridurre MgCl₂ a 1–1.2 mM.
- Diminuire la concentrazione del primer a 0.1–0.15 µM.
- Riprogettare i primer per una maggiore specificità (usare BLAST).
- Ridurre il numero di cicli a 25–28.
Sbavatura
- Causa: Eccesso di template, template degradato o sovracciclaggio.
- Soluzioni:
- Ridurre il template a 10–50 ng.
- Verificare l'integrità del template.
- Diminuire i cicli a 25–30.
- Usare dNTPs e polimerasi freschi.
Dimers di Primer
- Causa: I primer formano auto- o etero-dimeri, visibili come bande a basso peso molecolare (<100 bp) nel NTC.
- Soluzioni:
- Riprogettare i primer per minimizzare la formazione di dimeri.
- Ridurre la concentrazione del primer a 0.1 µM.
- Aumentare la temperatura di annealing.
- Usare Taq polimerasi hot-start per prevenire il priming non specifico durante la preparazione.
Strategie di Ottimizzazione
- PCR a Gradiente: Testare un intervallo di temperature di annealing (es. 50–65°C) in una sola corsa se il ciclatore supporta la funzione a gradiente.
- Titolazione di MgCl₂: Testare 1–4 mM di MgCl₂ in incrementi di 0.5 mM.
- Additivi: Per template ricchi di GC, aggiungere 5–10% di DMSO o betaina (1–2 M) alla reazione.
- PCR Hot-Start: Usare Taq hot-start (es. Platinum Taq) per ridurre l'amplificazione non specifica durante la preparazione.
- PCR Touchdown: Iniziare l'annealing a 5–10°C sopra la Tm, diminuendo di 0.5°C per ciclo per 10 cicli, poi continuare alla temperatura più bassa. Migliora la specificità.
Conclusione
Questo protocollo PCR completo fornisce un quadro robusto per amplificare il DNA con alta specificità e resa. Seguendo i passaggi dettagliati per la progettazione dei primer, la preparazione della reazione, il ciclaggio termico e l'analisi del prodotto, gli utenti possono ottenere risultati affidabili per un'ampia gamma di applicazioni. I suggerimenti per l'ottimizzazione e la risoluzione dei problemi garantiscono il successo anche con template o primer difficili. Per applicazioni avanzate, adattare il protocollo come descritto e consultare le linee guida del produttore per reagenti o attrezzature specializzate.